
An Agent with the correct permissions can create a new Client by following the steps below:
1. The Agent user should log in to Paydashboard with their Agent user name and password.
2. From your Agent dashboard click ADD NEW CLIENT.
NAME:
This is the Client Name, and will be visible throughout the platform.
REFERENCE:
This is an internal reference that is meaningful to the Agency. Once populated this will be visible on Agent screens.
LOGO:
The logo is optional and can be added at a later date.
BUSINESS INDUSTRY:
If none of the categories apply, then select Other and type the detail
PAYSLIP SOURCE:
This will inherit the standard set for the Agency, but can be changed per Client.
TEST MODE:
Whilst the tick is present, no emails are issued to the employees of this Client. We suggest leaving this ticked until the Client is ready to launch.
RESTRICTED CLIENT:
PayDashboard allows you to restrict access to your clients, allowing only authorised users access to them. This feature can also be used for managing internal payrolls, allowing only an admin user access to the internal payroll. To access Restricted clients a user must have the restricted client permission ticked under their account permissions.
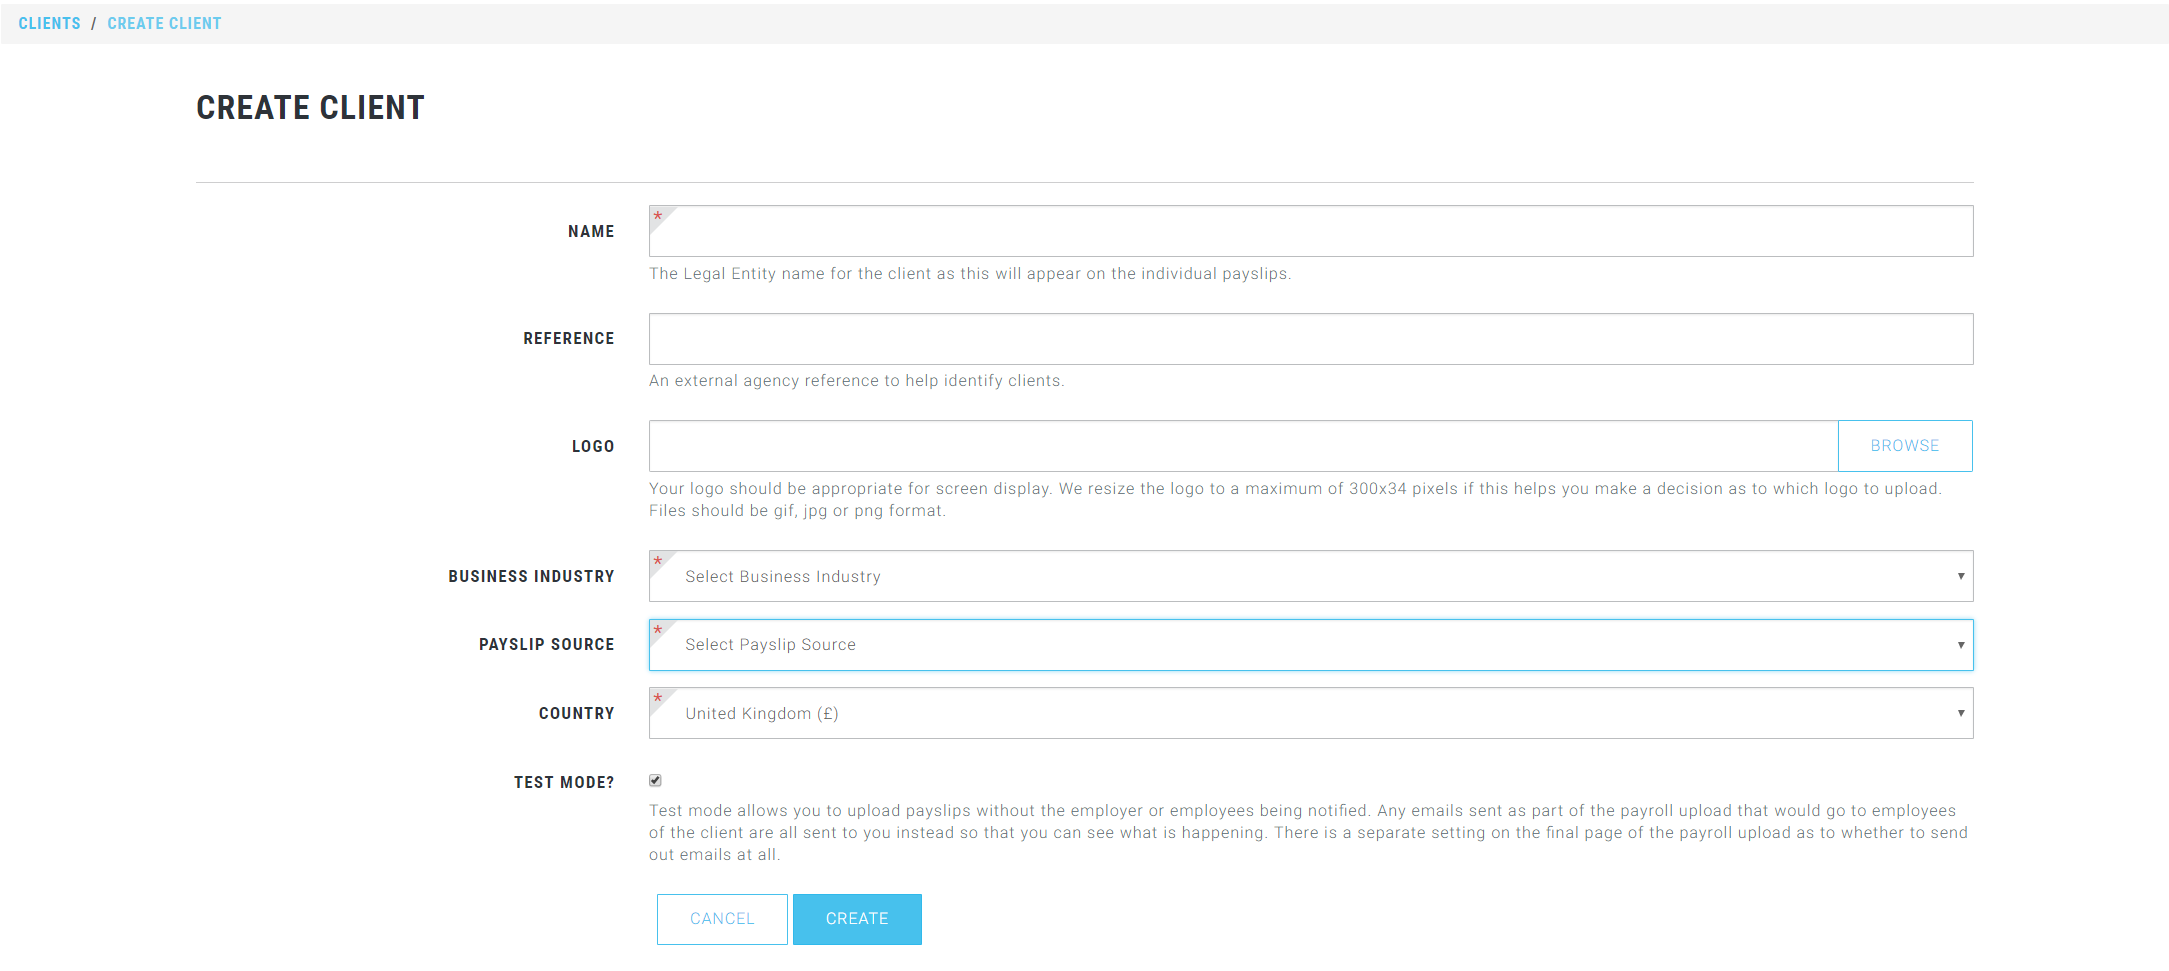
3. Enter the details about the Client. Those marked with a ‘*’ are mandatory and must be completed. Click CREATE once completed.
Once the Client is created you are able to work through each of the blue buttons to update
the information as per below. Please note this is optional.
Set Up Check List
This can be completed by the Agent User or Client User. Once each task is completed put
a tick in to the check box.
Users
Create your Client Users using the guide Creating New Employer Users
Contacts
Assign your contacts to the Client based on the Client Users created.
Assign Agents
Assign the agent user to the Client. This can be completed in mass – see guide Setting up
your agency.